Screen grabs are easiest to read in landscape. For the clearest view of each step, turn your phone sideways.
Step 1
See what you owe, before HMRC asks
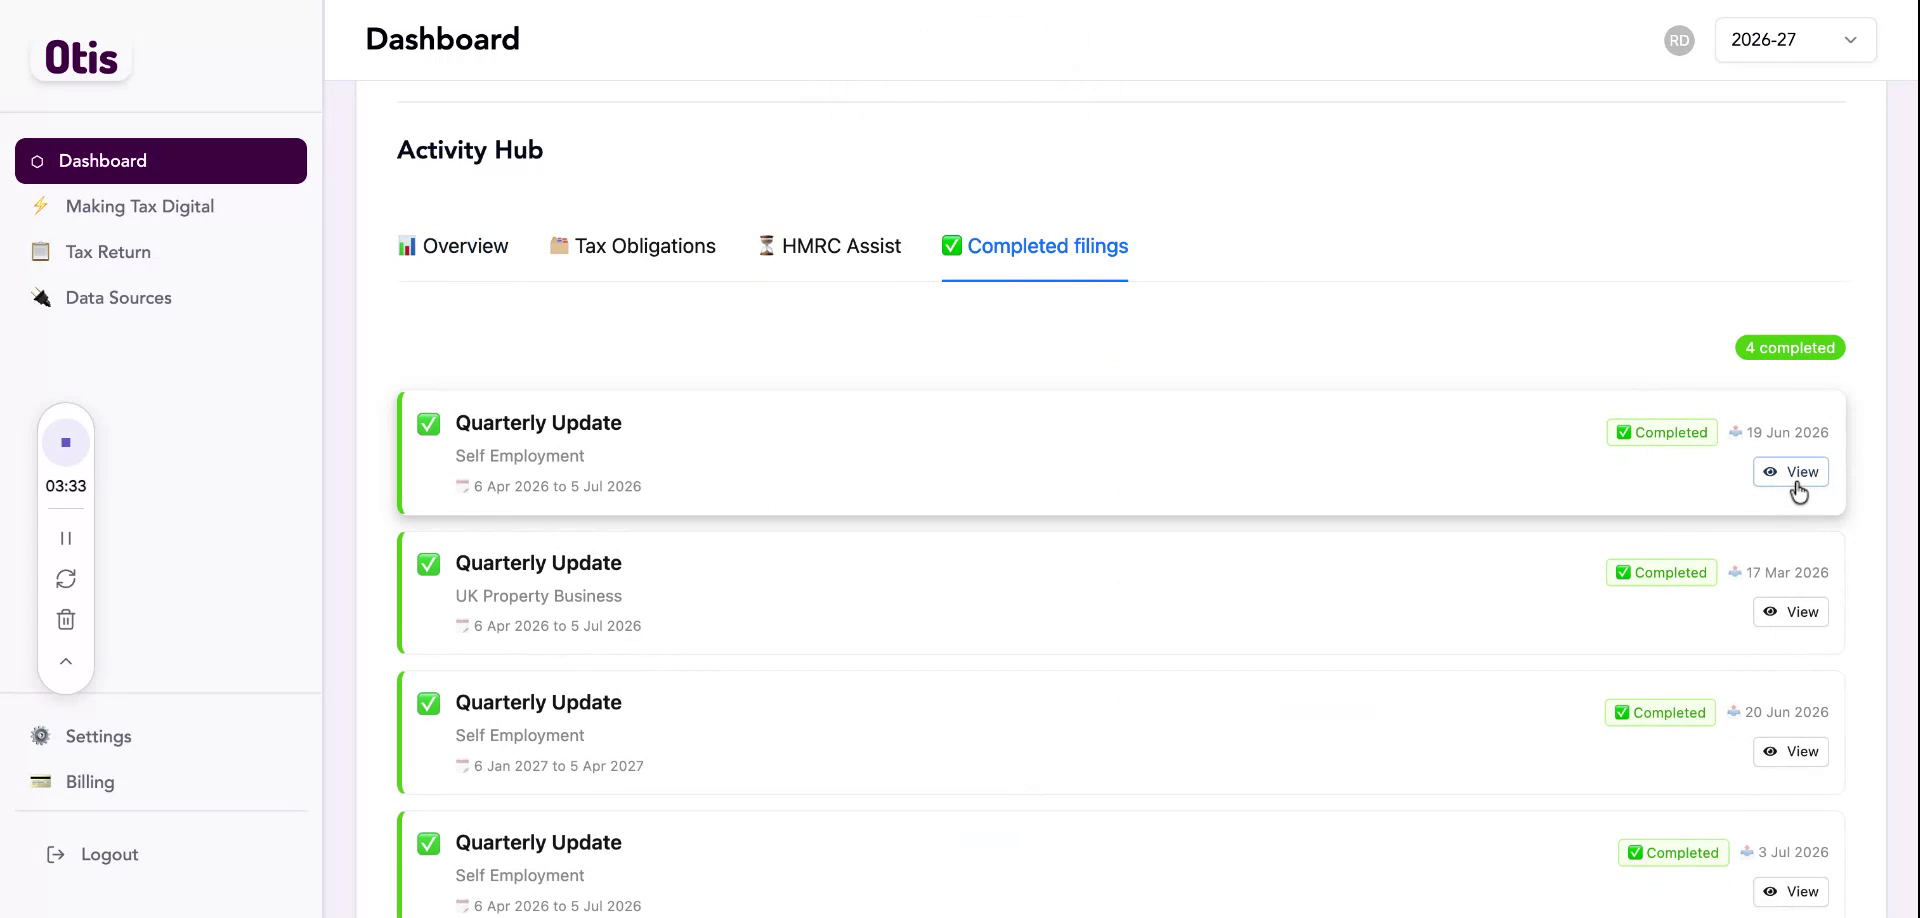
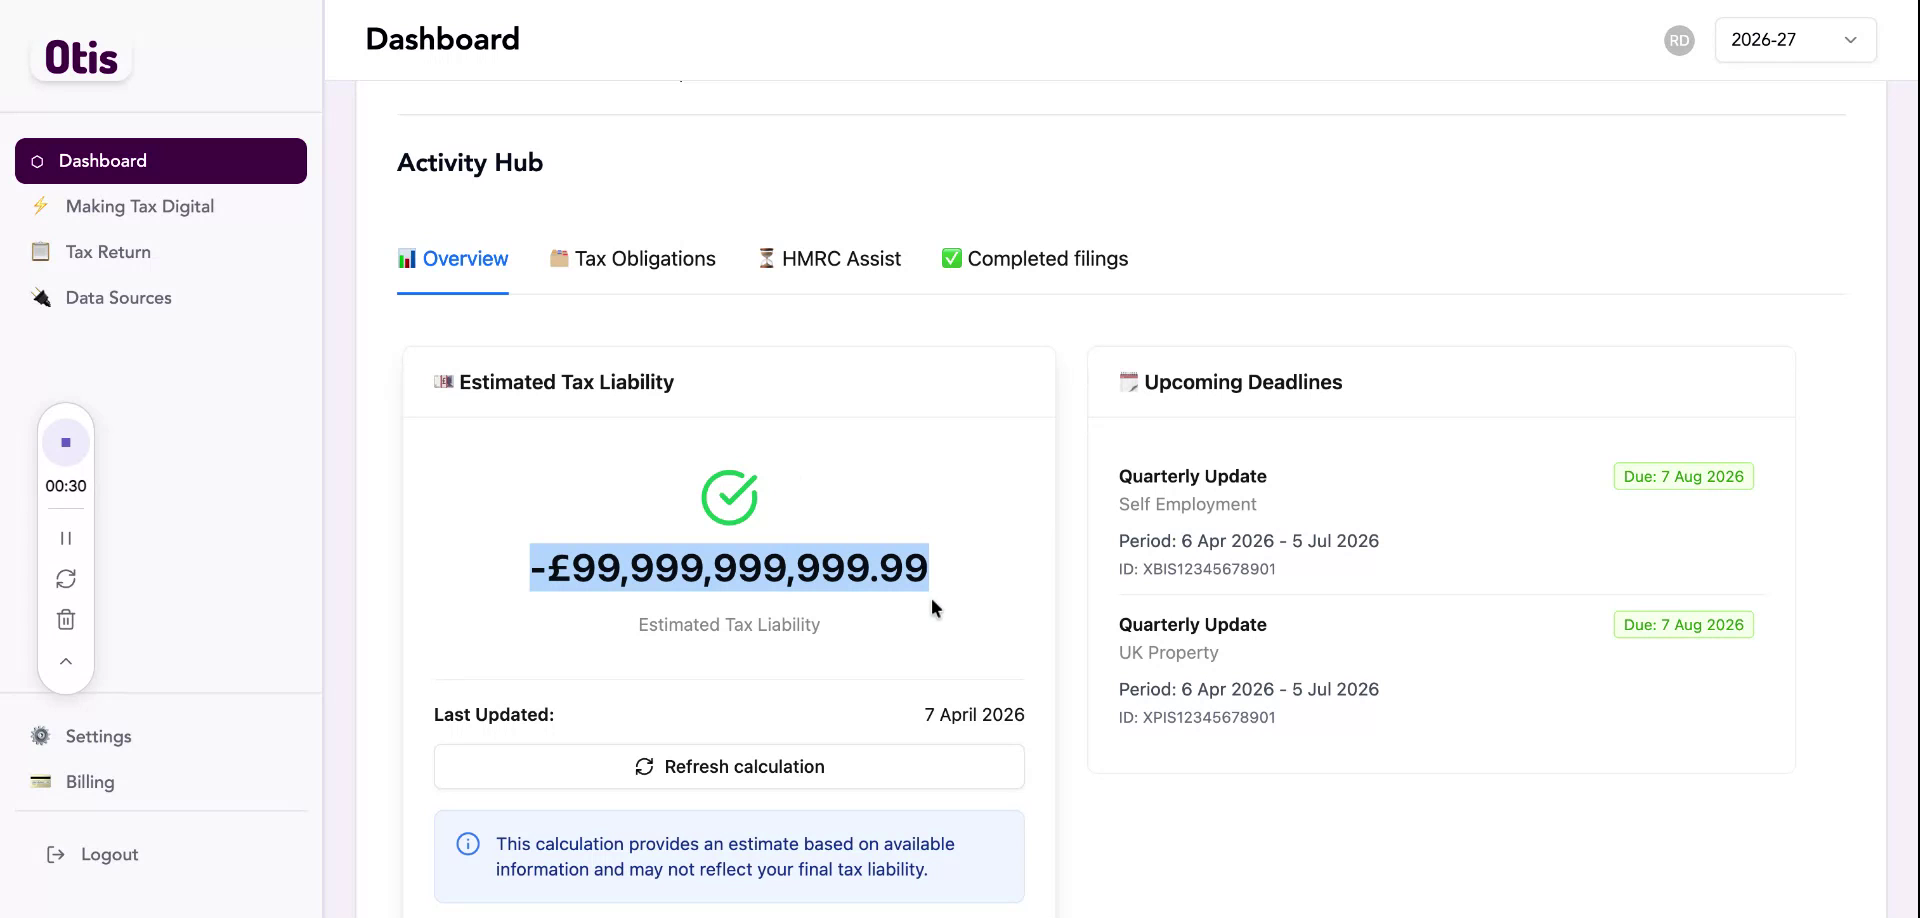
Log in and your dashboard is already waiting with two things you actually need: what is due next, and what you are likely to owe. With your permission, Otis connects securely to HMRC and retrieves both for you, so there is no need to call up and check yourself.
- Upcoming tax deadlines, so nothing is missed
- Estimated tax liability, pulled directly from HMRC
The screens in this guide show a test environment. The figures displayed are not real HMRC liabilities.
Step 2
Open Making Tax Digital
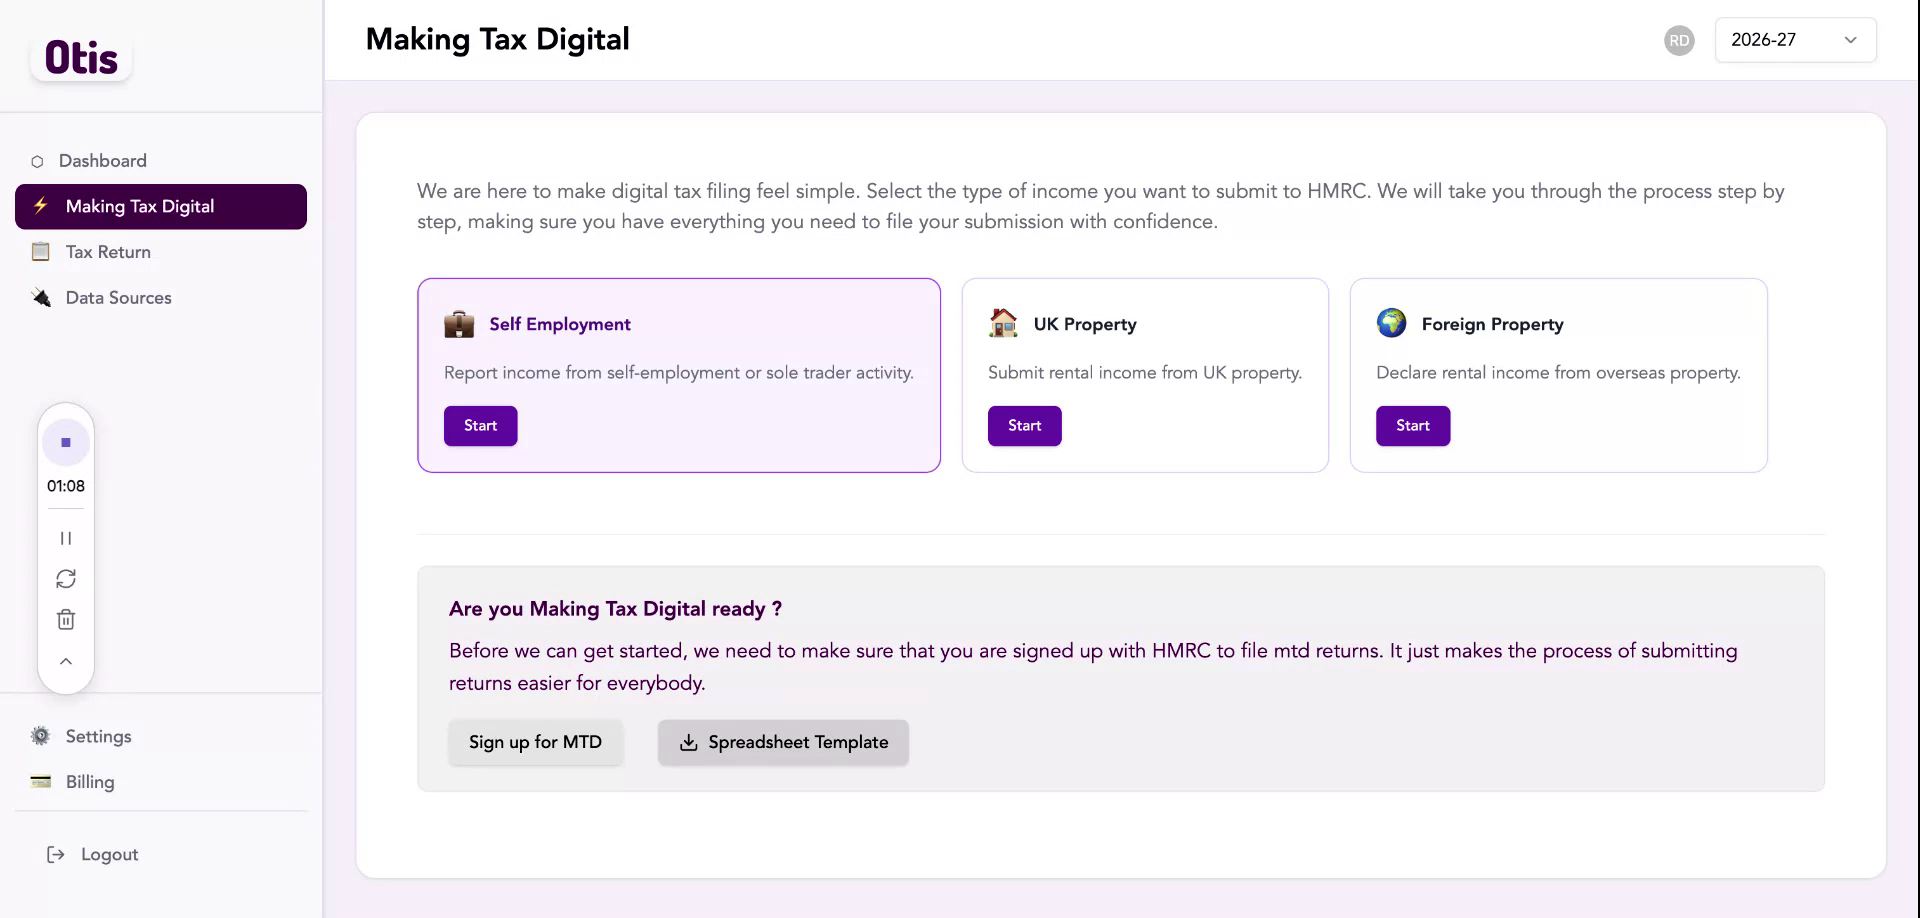
From the main dashboard, head to the Making Tax Digital area to start a submission. You will be asked which kind of return you are filing.
- Self-employment, for sole traders such as dentists, creatives, and freelancers
- UK landlord
- Overseas landlord
Step 3
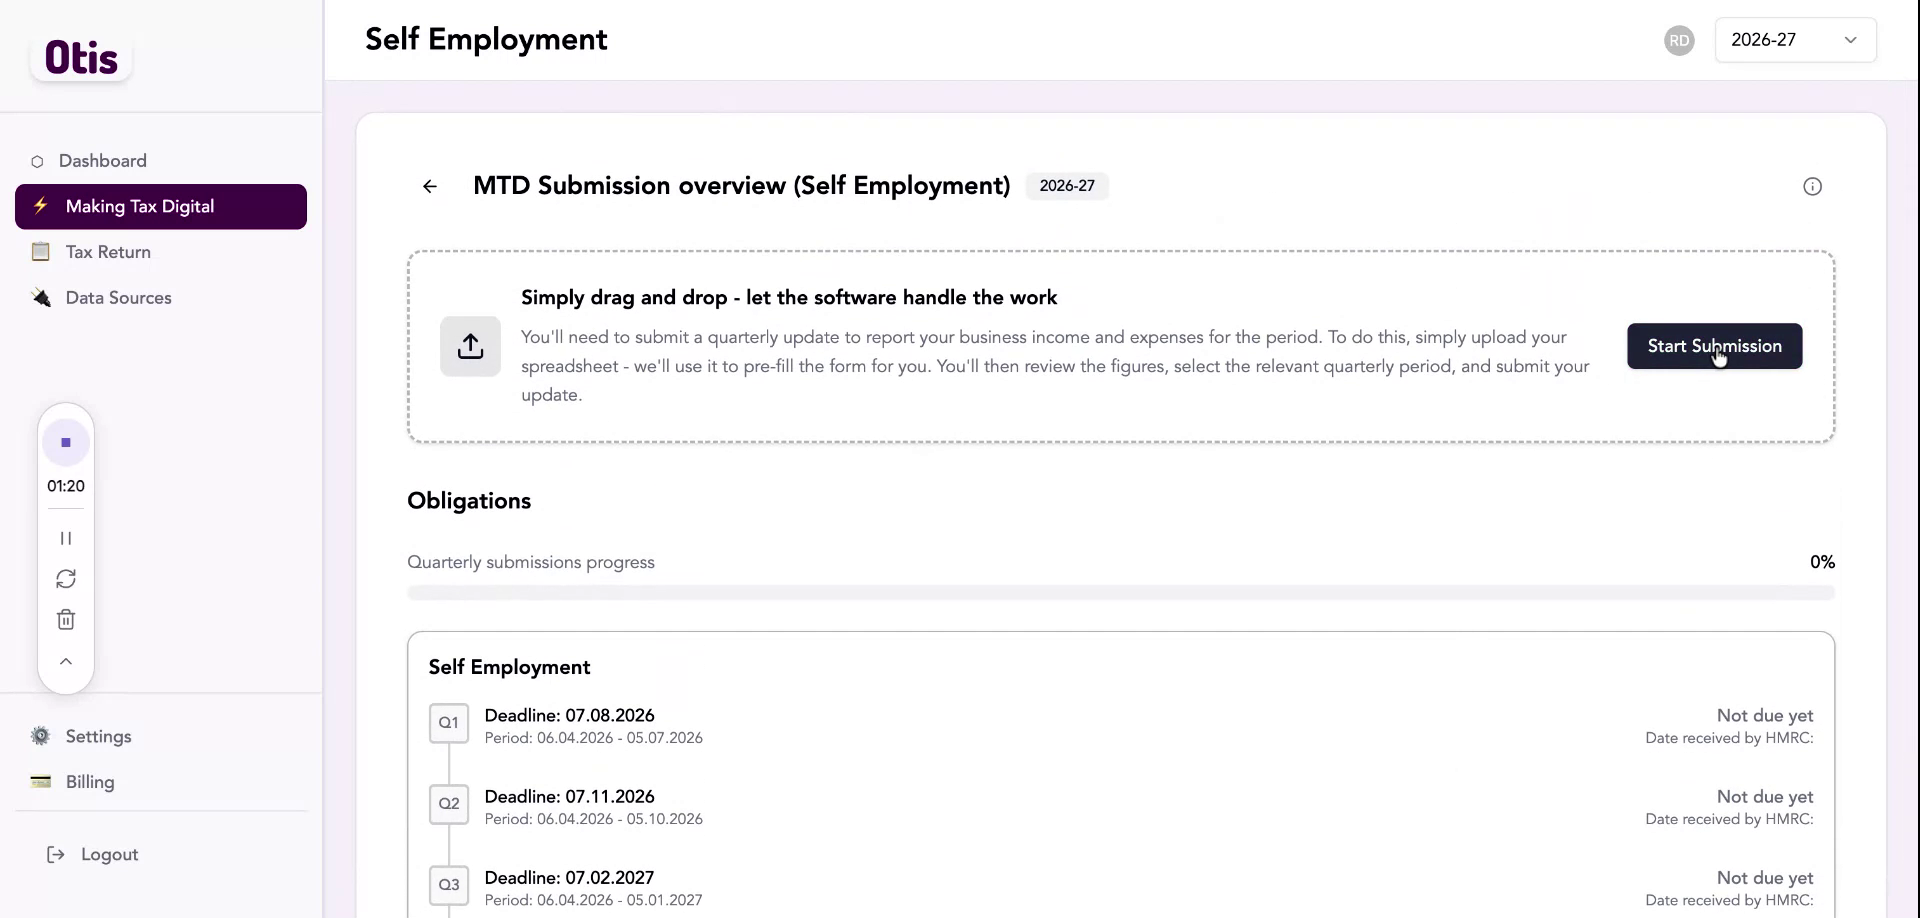
Choose self-employment
Select self-employment to begin a submission for a sole trade business. Otis shows your relevant deadlines again here, pulled from HMRC, so you can confirm you are filing the right return at the right time. Click Start Submission to continue.
Step 4
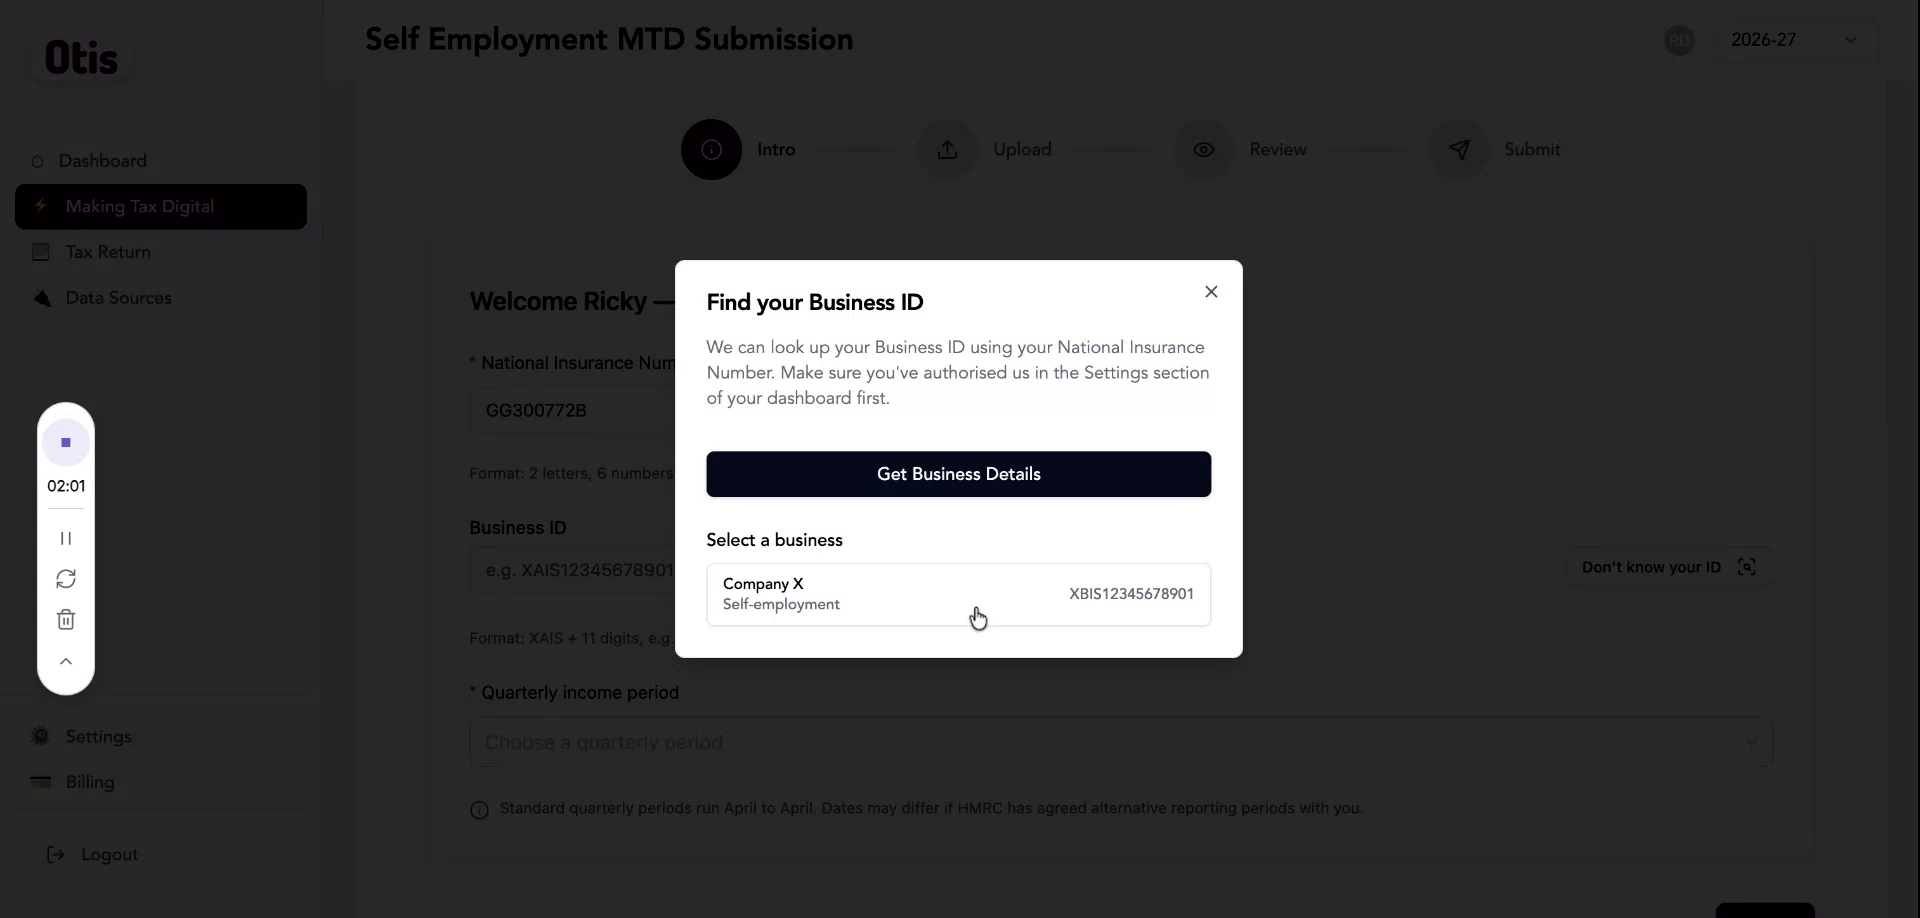
Confirm who you are and which business you are filing for
Enter your National Insurance number, then your Business ID, the identifier tied to your sole trade or landlord business. It is usually a 10 digit code preceded by four random characters.
- Do not know your Business ID? Click Get Business Details and Otis retrieves it from HMRC
- Otis then lists every trade or business HMRC has on record for you, so you can select the correct one
Step 5
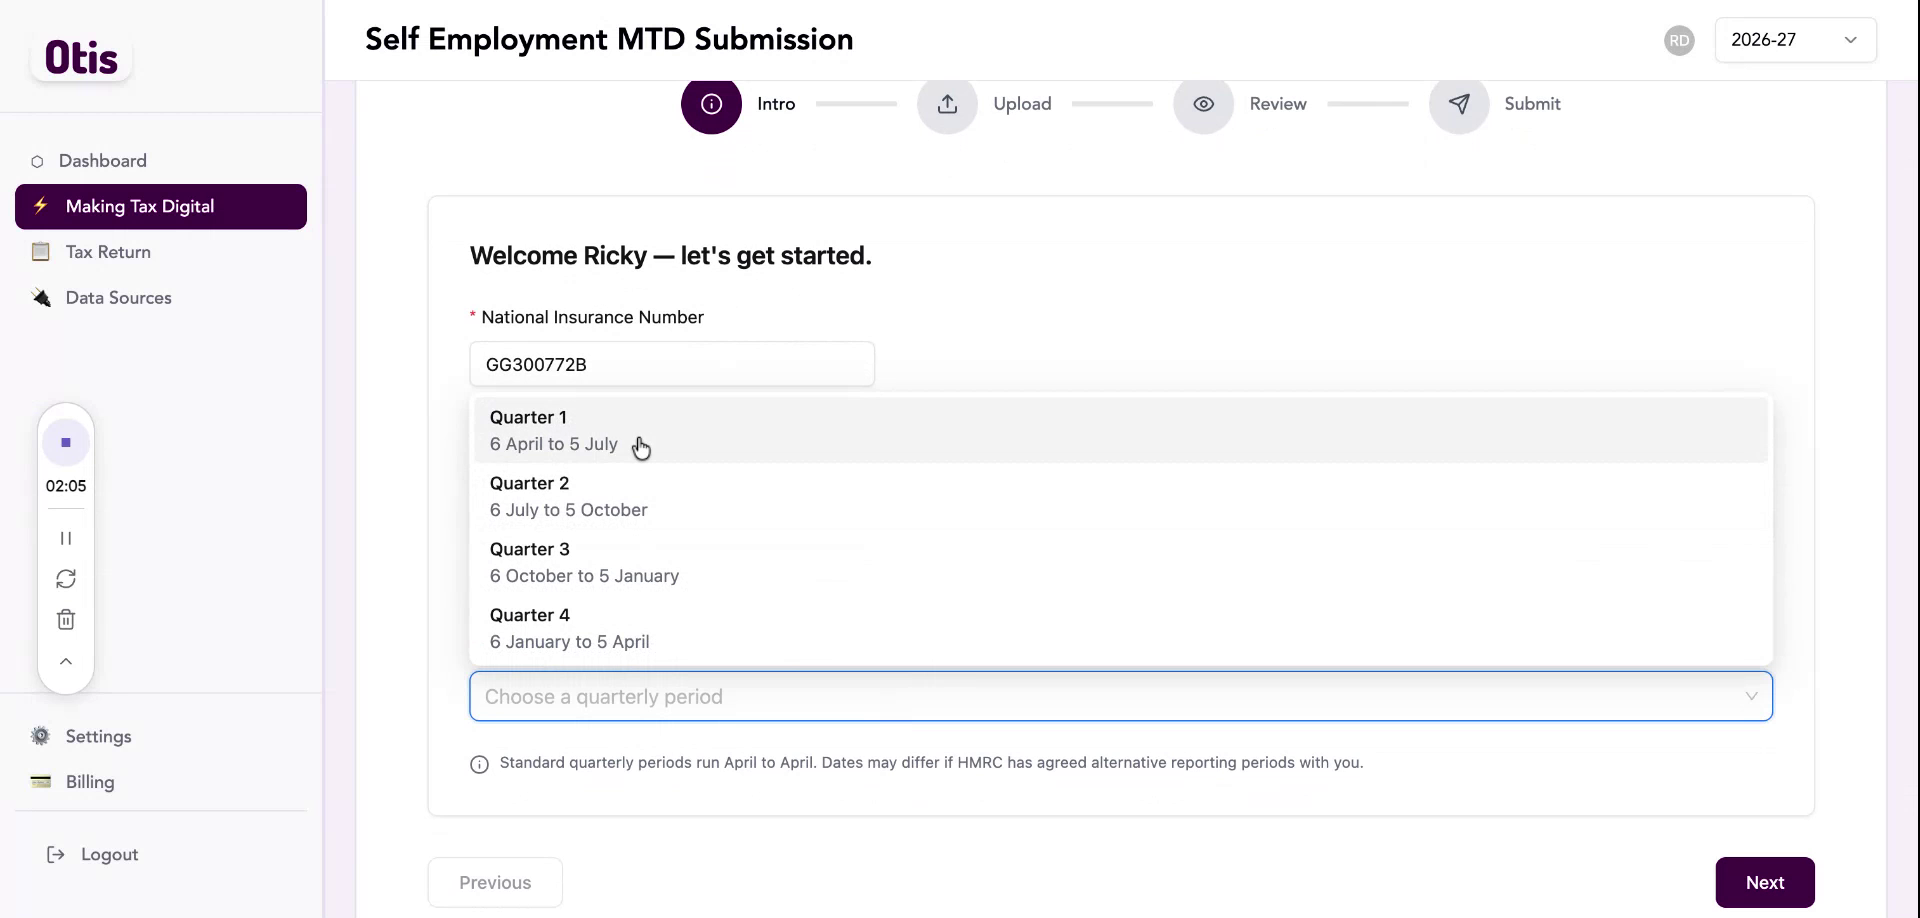
Pick the quarter you are filing for
Choose the relevant quarterly period, for example 6 April to 5 July, then click Next to continue.
Step 6
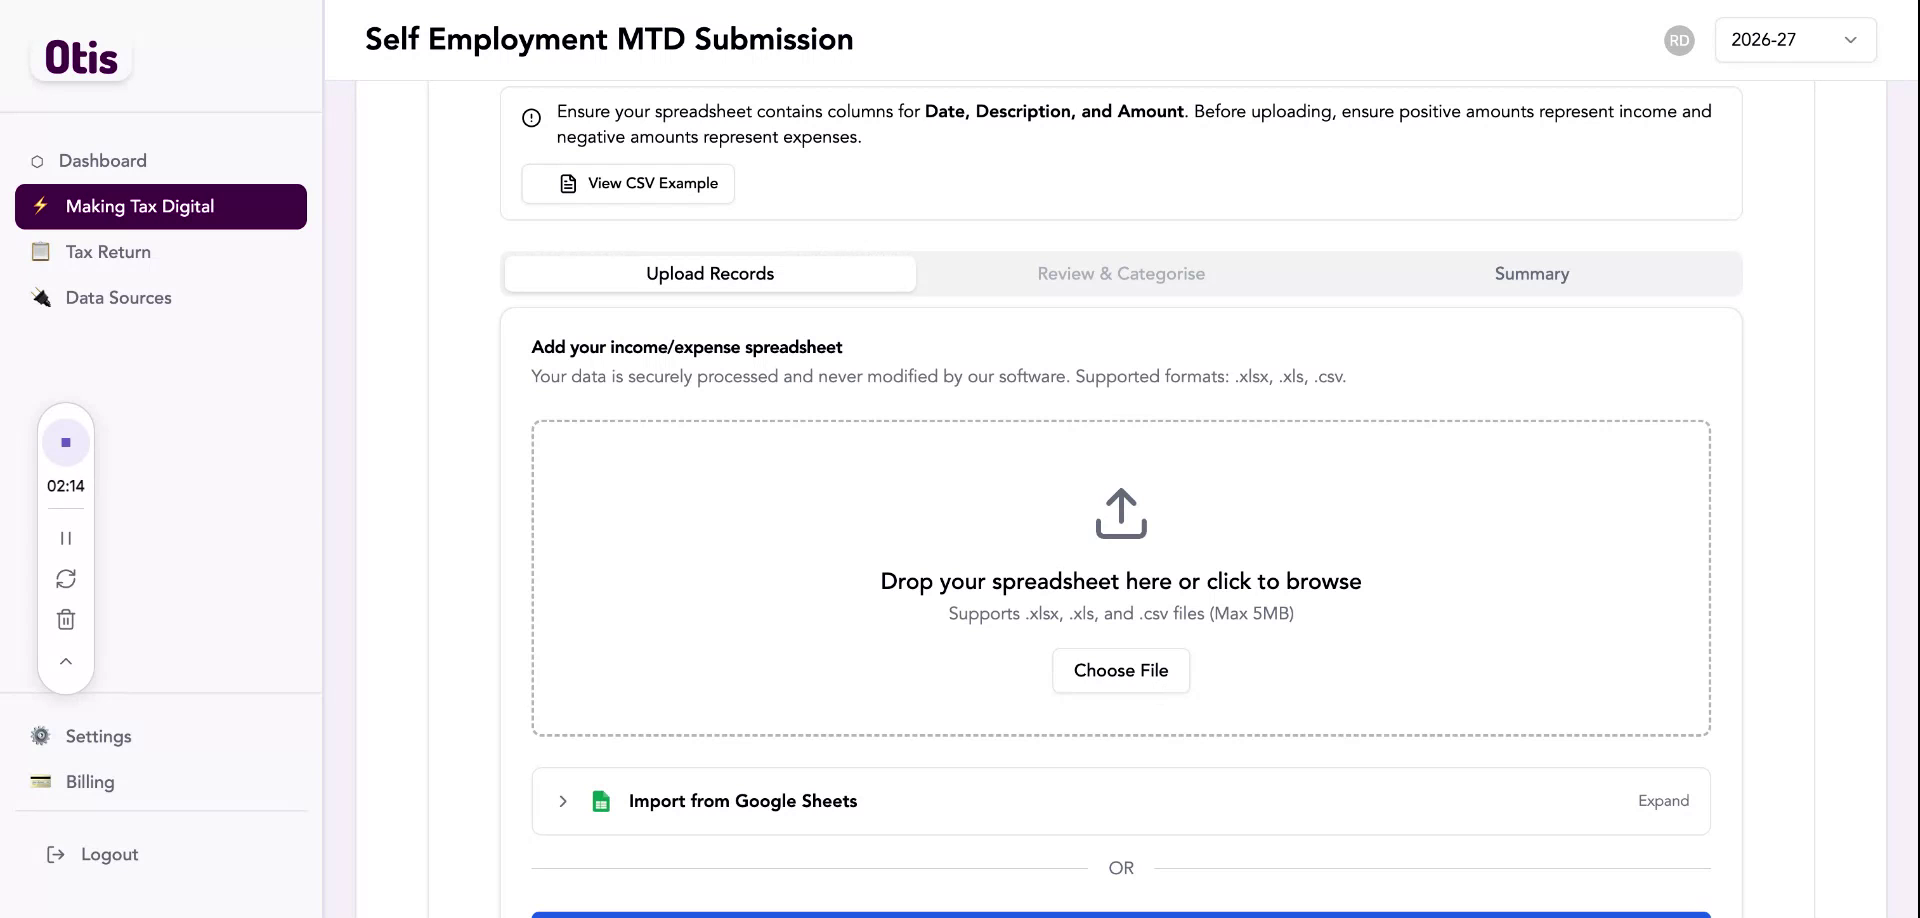
Upload your spreadsheet, let Otis do the sorting
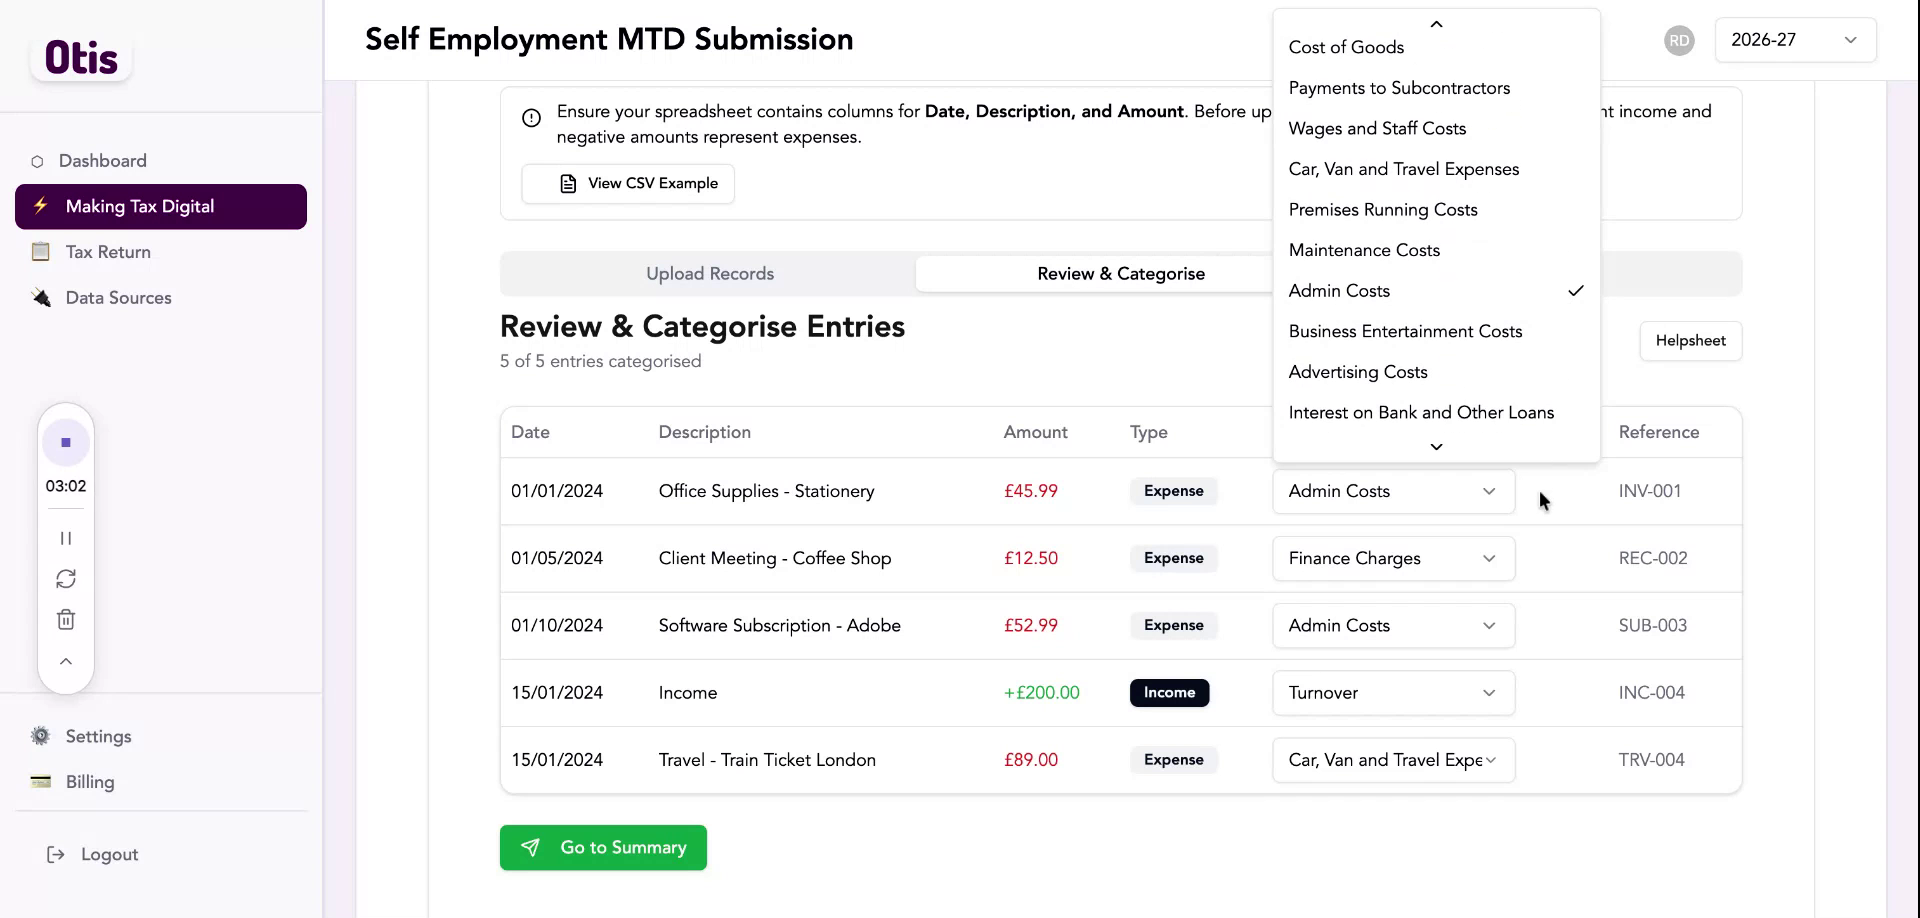
Select and upload the spreadsheet holding your income and expenses for that period. Otis pulls in every entry, then runs a categorisation engine in the background that matches each line to the right HMRC category based on its description.
- Income and turnover
- Train travel tickets
- Car and van expenses
- Admin costs, mapped to office supplies
Any category can be changed if you feel necessary.
Step 7
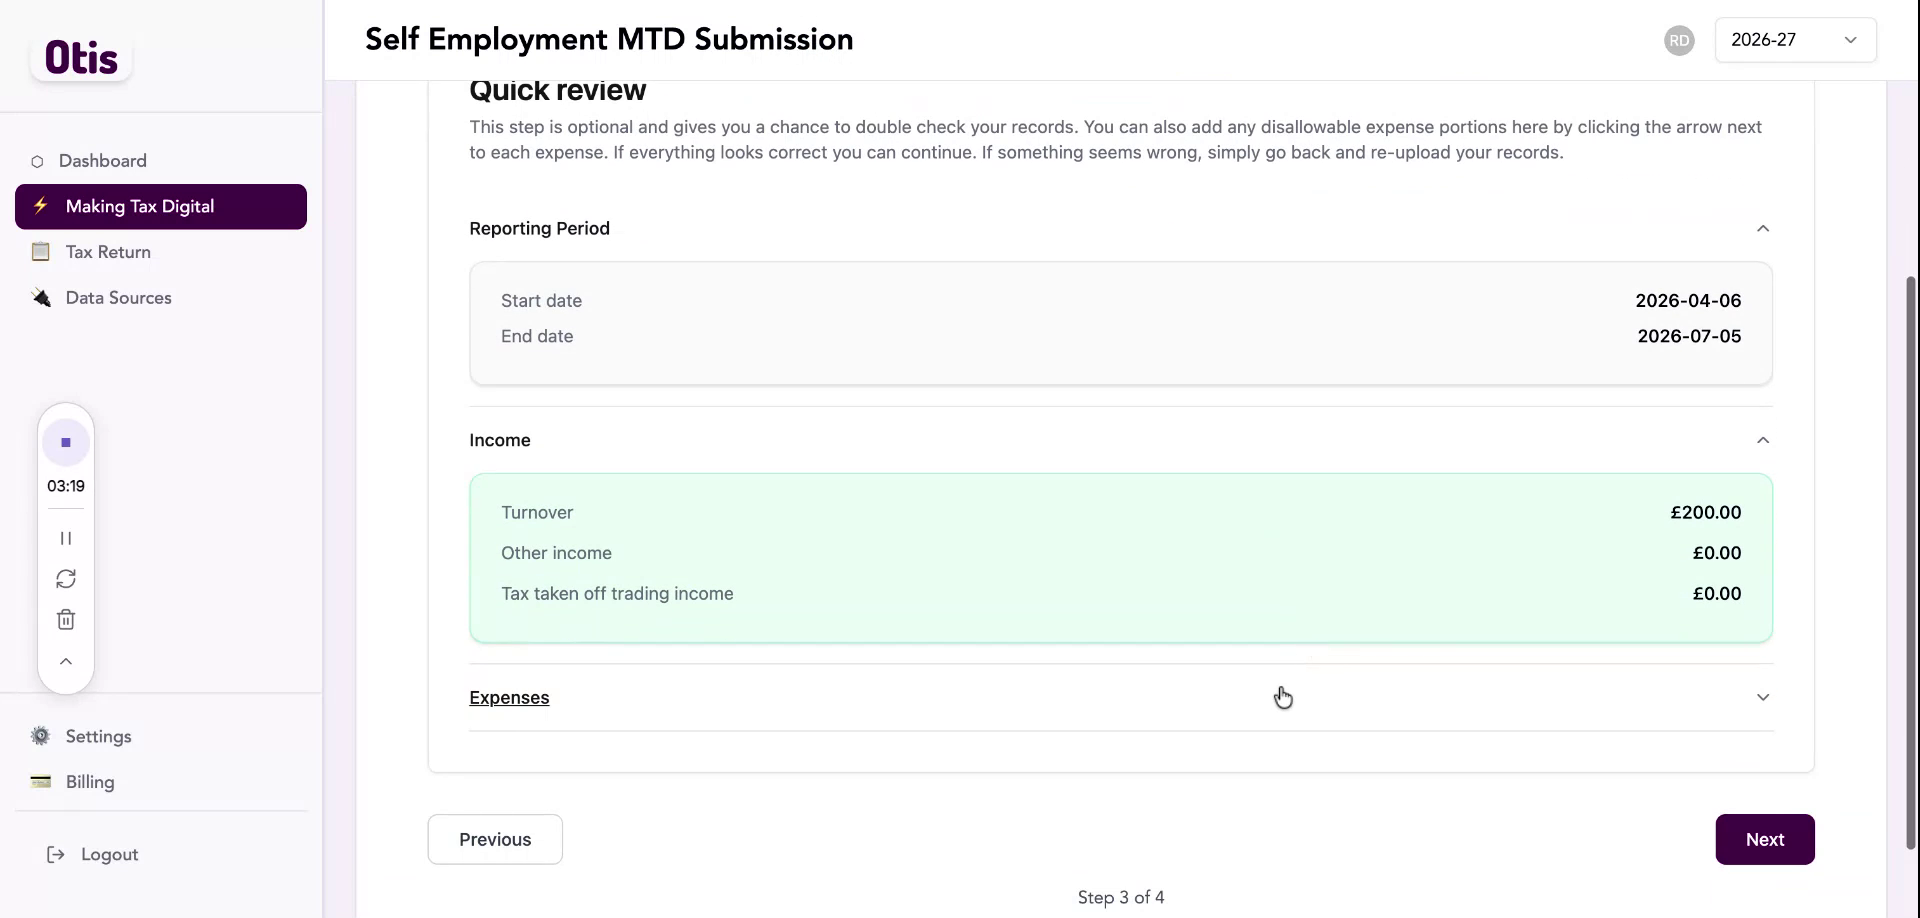
Review the summary, line by line
Move to the summary screen and check the figures and categories. This is a checkpoint, not an edit suite: Otis never alters your data, it only displays what your spreadsheet already contained. When it looks right, click view summary.
Step 8
Final check, then submit to HMRC
One last review screen shows everything you are about to send. Confirm the details are complete and accurate, click Next, then click Submit the Form to file your Making Tax Digital return with HMRC.
Step 9
Filed. See it confirmed.
Head to Completed Filings and there it is: a record of every return you have filed through Otis, confirming the submission went through.